How embarrassing! I thought I published this post on Friday. 

It's time for another installment of The Cake Slice Baker's!  I know it has been a while since I've participated and all because of my computer problems.  (Still waiting on the computer tech!)

This month's cake is one of my favorites...Tres Leches (Three Milks).  I loved it!

The actual cake was a little denser than I prefer for a Tres Leches cake, but it was delicious and held together very nicely after the addition of the three milks.
 
After tasting this cake, Hubby declared that it was the best Tres Leches cake he has ever tasted.  And Hubby isn't a big fan of Tres Leches.  The kiddies loved it too.  My daughter Ashley liked it so much that she wants me to make it again for her birthday next month!

Be sure to check out the rest of The Cake Slice Baker's to see how they liked this cake! 


Johnny C's Tres Leches Cake 
(from Southern Cakes by Nancie McDermott)

Ingredients:
Cake

  • 3 cups all-purpose flour
  • 1 tablespoon plus 1 teaspoon baking powder
  • 1 cup butter, softened
  • 2 cups sugar
  • 4 eggs
  • 1 cup milk


Three-Milk Sauce

  • 1-1/2 cups milk
  • 1/2 cup sweetened condensed milk (I used the whole can!)
  • 1 can (12 oz.) evaporated milk
  • 1 tablespoon grated lime zest


Garnish

  • Sweetened whipped cream
  • Fresh Fruit


Directions:
Heat the oven to 350 F.  Grease and flour a 9 x 13-inch pan.  In a medium bowl, combine the flour and baking powder and stir with a fork to mix well.


In a large bowl, combine the butter and sugar; beat with a mixer at high speed to mix well.


Add the eggs, one at a time, beating well each time and stopping to scrape down the bowl occasionally, until the batter is light, fluffy and smooth.


Add one-third of the flour mixture.  Then half of the milk.  Beating at low speed each time, just until the flour or milk disappears into the batter.


Add another third of the flour, the remaining milk and the remaining flour in the same way.


Pour the batter into the prepared pan and bake at 350 F for 35 to 40 minutes, until the cake is golden brown, springs back when touched lightly in the center and begins to pull away from the sides of the pan.


Cool the cake in the pan on a wire rack for 10 minutes.  Sprinkle the lime zest over the cake.  Punch holes with a toothpick in the top of the cake about 1 inch apart.


While the cake is cooling, make the sauce by combining the milk, sweetened condensed milk and evaporated milk in a medium saucepan.  Heat gently over medium heat, stirring often, until the mixture forms a smooth, steaming hot sauce.  DO NOT LET IT COME TO A BOIL! 


Slowly pour the warm milk sauce over the warm cake in stages, stopping to let the cake absorb some of the sauce before adding more. 


Let stand for 1 hour.  Cover and refrigerate, allowing the cake to come to room temperature before serving.  Cut into square and serve right from the pan.  Garnish with sweetened whipped cream and fresh fruit, if you like.

Enjoy!!!


Printable Version


Photobucket

Tres Leches Cake...Très Magnifique!


There are still a few days of summer left to enjoy and I'm sure don't want to spend them slaving over a hot stove.  So today, I am going to share a quick and easy way to prepare Ceviche de Camaron.  It might not be the "traditional" way of preparing it, but it tastes just as delicious! (I promise to post the traditional recipe soon!)

Ceviche de Camaron
(Shrimp Ceviche)

Ingredients:

  • 1 pound cooked shrimp, peeled, deveined and finely chopped
  • 2 to 3 medium tomatoes, finely chopped
  • 1/2 medium onion, finely chopped
  • 2 tablespoons cilantro, finely chopped
  • 1 to 2 serrano chilies, seeds removed and finely chopped
  • 1/2 cup fresh lime juice


Directions:
Combine the tomato, onion, cilantro and serrano chilies.


Stir in the shrimp and lime juice.  Refrigerate for at least 1 hour before serving.  Serve with plenty of tostadas. 

Enjoy!!!


You might also like these delicious Mexican shrimp dishes: 


Photobucket

Ceviche de Camaron {Shrimp Ceviche}

The other night, Hubby and I were having a profound conversation, trying to answer the age-old question of...If you could only eat one comida (food) for the rest of your life, what would it be? Hubby quickly chose chicken, because it can be prepared in a variety of ways.

I, on the other hand, found it very difficult to answer the question. I love food too much. How could I possibly choose just one food to eat for the rest of my life? But today, after a visit to our local fruteria (produce market), I finally came up with an answer...Zucchini!  Not only is it my favorite veggie, it also happens to be way more versatile than chicken. Can you imagine eating a chicken dessert? No, gracias! But zucchini is so versatile it can be eaten both sweet AND savory.

One of my favorite ways to eat zucchini is in Tortitas de Calabacita (Zucchini Fritters/Latkes).  I love them for breakfast or as a side dish with a little Jalapeño Lime Mexican Crema or Chile de Molcajete on the side. During Cuaresma (Lent) I like to serve my tortitas in Mole Ranchero. But Tortitas de Calabacita also make for a great meatless filling for a veggie burger.


Zucchini Latkes (Tortas de Calabacita) - lacocinadeleslie.com

Tortitas de Calabacita
(Zucchini Fritters/Latkes)

Ingredients:
  • 4 cups shredded zucchini
  • 2 large eggs
  • 4 tablespoons masa harina (I use Maseca brand) 
  • 2 tablespoons chopped onion
  • Butter or vegetable oil (for frying)

Directions:
Place the shredded zucchini in a fine-sieve strainer.  Using the back of a spoon, press on the zucchini, to drain all of the liquid.  Transfer the zucchini to a medium bowl.  Add the eggs, masa harina, and onion.  Season with salt and pepper. Mix until well combined.

Heat 1 to 2 tablespoons of butter or vegetable oil in a large non-stick skillet over medium-low heat.  Spoon 1/4 cupfuls of batter into skillet; flatten the patties slightly.  (Cook 3 or 4 patties at a time.) Cover skillet and let cook for 3 to 5 minutes per side until golden brown. Serve with Mexican crema or your favorite salsa. Enjoy!


Tortitas de Calabacita (Zucchini Fritters) - lacocinadeleslie.com


Photobucket


Tortitas de Calabacita {Zucchini Patties}

We spent the weekend at El Rancho this weekend helping my brother-in-law and his family harvest bell peppers. I love the smell of fresh bell peppers, but the aroma of these homegrown bell peppers was so intoxicating. I wanted to bite into those bell peppers as if they were a juicy apple. And the entire time we were gathering the bell peppers, all I could think of was getting home to make my Philly Cheesesteak Molletes. If you like Philly Cheesesteaks, you're going to love these Philly Cheesesteak Molletes. Open faced sandwiches made with sauteed onion and bellpepper, tender cuts of beef on a crusty bolillo roll with refried beans and topped with delicious melted Manchego cheese.

Philly Cheesesteak Molletes - lacocinadeleslie.com

Philly Cheesesteaks

Ingredients:
  • 2 tablespoons vegetable or olive oil 
  • 4 large bell peppers, thinly sliced
  • 1 large onion, thinly sliced
  • 1 clove garlic, minced 
  • 1-1/2 pounds thin-cut beef steak, cut in strips
  • 6 bolillo rolls, cut in half lenghtwise
  • 2 cups Refried beans (homemade or canned) 
  • 2 cups shredded Manchego cheese

Directions:
Heat 2 tablespoons of vegetable oil in a large skillet, over high heat. Add the sliced bell pepper and onion; saute for 2 to 3 minutes. Stir in the minced garlic and saute for an additional 30 seconds. Add the thin-cut beef steak; season generously with salt and pepper. Saute the meat until no longer pink. Cover the skillet and reduce heat to low. Let simmer until all of the juices from the meat have been absorbed and the meat is tender.

While the meat is cooking, heat the refried beans in a small saucepan; set aside. Spread the bolillo slices with Refried Beans. Spoon meat and bell pepper mixture on top of the refried beans. Top each mollete with cheese. Arrange the molletes on a lightly greased baking sheet and bake for 10 to 15 minutes or just until the cheese has completely melted and started to bubble. Enjoy!


Philly Cheesesteak Molletes

I was born and raised in sunny southern California, but most of time I'm just a southern girl at heart. I blame it on the 3 years that I lived in Texas and the wonderful southern food my Great-Grandmother prepared: peach cobbler, fried okra, cornbread, buttermilk biscuits, gravy, and chicken fried steak. (Swoon!) I'm getting hungry just thinking about it.

The first time I prepared chicken fried steak for Hubby, he said it reminded him of Milanesas, which is a thin cut of steak coated with bread crumbs instead of flour. In Mexico there's even a cut of meat called milanesa, which is usually cut into thin steaks just for this purpose.

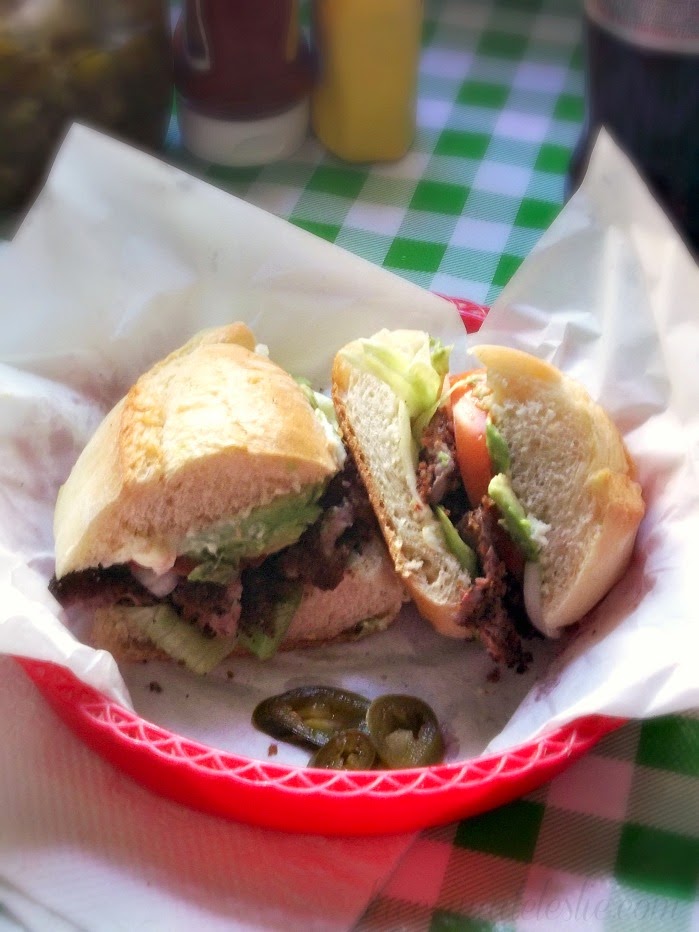
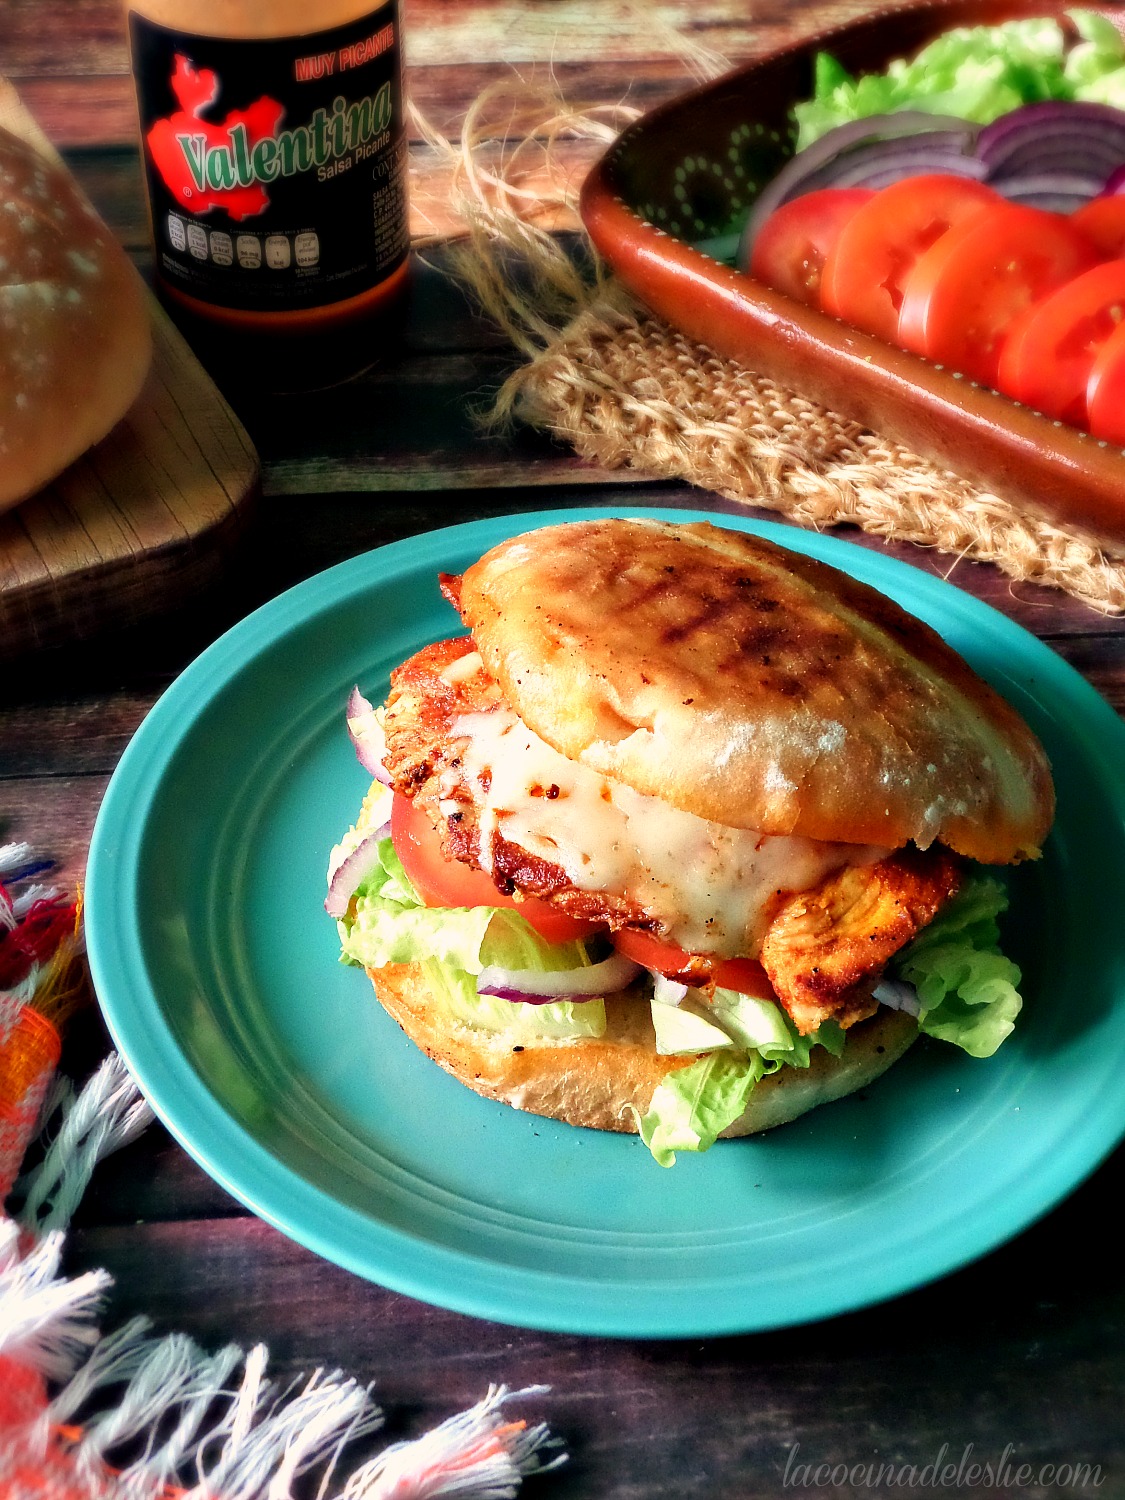
Milanesas empanizadas (breaded milanesa steaks) can be served a variety of ways, one of which is covered in a spicy salsa and served with Mexican Rice and Refried Beans on the side.  But my favorite way to enjoy them is in a Torta de Milanesa (a breaded steak sandwich). Tortas de Milanesa can be served on bolillo rolls or hamburger buns.


Torta de Milanesa de Res - lacocinadeleslie.com

Torta de Milanesa
lacocinadeleslie.com

Ingredients:
  • 1 pound thin-cut steak (I used milanesa)
  • 1 cup milk
  • 2 cups plain bread crumbs
  • 1-1/2 teaspoons seasoning salt
  • Vegetable Oil (for frying)
  • Bolillo rolls or hamburger buns
  • Mexican crema
  • Lettuce
  • Sliced red onion
  • Sliced tomato
  • Sliced avocado
  • Sliced Jalapeños en Escabeche

Directions:
Pour the milk into a medium-sized bowl; set aside.  Place the bread crumbs in another medium-sized bowl.  Season the bread crumbs with the seasoning salt; set aside. Season the thin-cut steaks with salt and pepper; set aside on a plate.

Dip the steaks in the milk, one at a time, then dip them in the bread crumb mixture making sure that both sides are evenly coated. Transfer the breaded steaks to a platter, and continue preparing the rest of the steaks.

Heat 2 tablespoons of oil in a medium skillet.  Fry the steaks in the oil until they turn a nice, golden brown on both sides.

To prepare the Tortas, split bolillo rolls in half lengthwise. Toast bolillo rolls on a griddle or comal.  Spread the cut sides with Mexican crema(If you don't have Mexican crema, use your favorite mayonnaise.)  Place 1 or 2 Milanesas atop the bottom bun. Top with lettuce, onion, tomato, avocado, and jalapeño.  Serve with homemade french fries or onion rings. Enjoy!  

Mexican Breaded Steak Sandwich (Torta de Milanesa de Res) - lacocinadeleslie.com


Torta de Milanesa de Res {Breaded Steak Sandwich}


Remember me?  Your favorite Mexican food blogger?

I know it has been quite some time since my last post.  And for that I would like to apologize.  My computer has been giving me grief for quite some time and it won't allow me to upload my recipe pics from my camera.  And I just can't bring myself to use someone else's photos for my recipes.

I was hoping to have my computer fixed this week, but it looks like it will still be another week or two.  As soon as it's fixed, you will be the first to know!

But I do have a little surprise for you.  As I was backing up my pics that I already have on my computer, I discovered a few photos from recipes I never got around to sharing with you.  I look forward sharing them with you in the next couple of days.

In the meantime, if you want to know what I've been up to, come visit my other blog, Motherhood in Mexico.  

Thank you all for being so understanding!

I'm Sorry. So Sorry.

It's easy to throw a meal together with a few basic ingredients, be it breakfast, lunch or dinner.

You will find that in most Mexican kitchens, we always have Chile de Molcajete and Frijoles de la Olla (Cooked Beans) in our refrigerator.  Those two staples alone are the beginning to a number of great meals.  But today, as I opened the fridge, I noticed that I still had 1/2 a kilo of chorizo just waiting to be used in something delicious, like Chilito de Chorizo.  Yummmm!   

Chilito de Chorizo
(Chorizo Chili)

Ingredients:

  • 24 tomatillos
  • Dried Chile de Arbol
  • 1 pound Chorizo (pork or turkey)
  • Cooked Beans (canned or homemade) *optional


Directions:
Remove and discard the husks from the tomatillos.  Rinse the tomatillos and place in a medium saucepan with a few Chiles de Arbol(I use 2 or 3, but if you can handle the heat add more!)  Fill the saucepan with enough water to cover the tomatillos.  Cook the tomatillos over medium-high heat until the tomatillos are tender.  

Let the tomatillos cool slightly, then transfer them and the chilies to a blender cup and puree until smooth.  (If the salsa is too thick, add some of the water that the tomatillos were cooked in.)  Season with salt; set aside.


In a medium non-stick skillet, brown the chorizo over medium-high heat until it is fully cooked.  (Chorizo releases it's own fat, so I don't add any oil.)  


Once the chorizo is ready, carefully pour in the tomatillo salsa.  Reduce the heat to low and let the Chilito simmer for 5 to 10 minutes.


Ladle the Chilito into a bowl, add some Cooked Beans if you like and serve with warm corn tortillas.  Enjoy!!!


With Love,

Chilito de Chorizo {Chorizo Chili}

When Hubby first mentioned this next recipe to me, it wasn't something that appealed to me.  After all, the only way I had ever had zucchini, was in Gramm's Guisado.  But Hubby assured me that his mom's way of preparing zucchini was even better.  And sweeter.  Sweet?!!!  Who knew zucchini could be sweet?

My mother-in-law prepared Calabacitas con Leche (Zucchini with milk) often for her six kiddies.  And they all still remember it fondly.  Calabacitas con Leche is just that, zucchini cooked with sugar and milk.  And it is delicious!  It tastes almost like Taninole (Pumpkin with Milk).   

Calabacitas con Leche

Ingredients:

  • 8 medium zucchini, sliced
  • 1/3 cup water
  • 2/3 cups sugar*
  • 2 cups milk
  • Ground Nutmeg (for garnish)


Directions:
Place the sliced zucchini, water and sugar in a medium saucepan.  Cover saucepan and cook over medium heat until almost all of the water has been absorbed. *If you have a sweet tooth, add more sugar.  These zucchini were very sweet, so I didn't need as much sugar. 


Add the milk and reduce the heat to low.  Cover saucepan and simmer until the milk begins to bubble. 


To serve, ladle the zucchini and plenty of milk into mugs or small bowls.  And sprinkle with ground nutmeg.  Enjoy!!! 


With Love,

Sweet home cookin' {Calabacitas con Leche}


It seems that almost every one of my recipes is my favorite.  Which they are.  But if you were to ask me which vegetable is my absolute, all-time favorite, I would say Calabacitas (Zucchini).  They're such a versatile veggie.  They can be sweet or savory, steamed, fried, baked and can even be eaten raw.

Last week, a local farmer drove through the neighborhood selling these freshly cut beauties for 8 pesos a kilo.  The hardest part was trying to decide how to prepare my 3 kilos of calabacitas.  I was in a "Comfort Food" state of mind, so I made Gramm's Guisado de Calabacita (Zucchini Medley).  The only way Gramm made zucchini was to saute it with some onion, tomato and yellow corn.   I prepare it the same way for my kiddies, but I like to add serrano chilies and Queso Fresco!  Mmmmmm!

Zucchini Medley

Ingredients:

  • 6 to 8 medium zucchini, sliced or chopped
  • 2 medium tomatoes, chopped
  • 1/2 onion, chopped
  • 1 to 2 serrano chilies
  • 1 small can yellow corn
  • Queso Fresco (for Garnish)


Directions:
In a large skillet, heat 2 tablespoons of vegetable oil over medium heat.   Add the onion and saute for 1 to 2 minutes.


Stir in the remaining ingredients, except the queso fresco.  Season with salt and pepper.  Saute for 3 to 4 minutes, then reduce the heat to low and cover the skillet.  Let simmer until the zucchini is completely cooked. (About 10 minutes.)


Just before serving, garnish with grated Queso Fresco Enjoy!!!


With Love,

Zucchini Medley

(Insert catchy game show music here!)

Okay friends, it is time to play one of my favorite games...Name.  That.  Fruit!  (Applause!) 


This lovely fruit, which I think looks like a petrified strawberry, was spotted today at our favorite fruteria.  Hubby was told the name, but since Hubby has a memoria de Teflon*, he forgot it in the 5 minutes that it took him to get home.  (*Teflon Memory: Nothing sticks to it!) 

In all honesty, I am not the adventurous type.  At least not where food is concerned.  But this is a fruit, so it can't be that bad.

The inside of the fruit was not what I expected.  (Although, I'm not really sure exactly what I expected!)  It looked and tasted like a grape.  Pretty darn good. 


Now for the Million Dollar Question...What is it?  

Photobucket
*NOTE: "Million Dollar Question" is just an idiom .  No money will be awarded for the right answer.  :) But isn't the knowledge that you know the correct name for this fruit reward enough?

Name that fruit!

This week we've been talking all about Comfort Food.  So while we're still on the subject I want to share one of my Hubby's favorite comfort food dishes...Picadillo.

This is one of those rare recipes, in which my grandparents' and mother-in-law's recipes are very similar.  The only difference is that Pappy (my grandpa) made Picadillo with ground beef and canned red enchilada sauce.   My mother-in-law uses thin-cut beef steak and prepares her own sauce using dried ancho chilies.

This is such a wonderful dish, however you choose to make it.  The dried ancho chilies offer plenty of flavor, but don't worry they don't pack any heat.  That's what the serrano chilies are for!  And if you're really feeling brave, you can use fresh jalapeño peppers.  Ay, ay, ay! 

lacocinadeleslie.com

Picadillo

Ingredients:

  • 1-1/2 pounds thin cut beef steak
  • 1/2 large onion
  • 1 to 2 cloves garlic
  • 3 dried ancho chilies
  • 2 medium tomatoes, chopped
  • 1/2 large onion, finely chopped
  • 1 to 2 serrano chilies, sliced


Directions:
Place the meat, half of the onion and the garlic in a medium saucepan.  Cover with water and season with salt and pepper.  Cook over high heat until it begins to boil.  Cover the saucepan, reduce the heat to medium-low and let the meat simmer until tender.  (About 60 to 90 minutes.)

While the meat is cooking, cook the ancho chilies in 2 cups of water until the chilies are soft.  Remove from heat and let cool slightly.  Remove the stems and seeds from the chilies.  In a blender or food processor, puree the chilies with the water they were cooked in, until smooth.  Season chili puree with salt; set aside.

Once the meat is tender.  Let it cool slightly, then shred it using two forks or with your fingers. Or pulse the meat in batches in a blender.  (That's how my mother-in-law shred her picadillo meat.) In a large skillet, heat 2 tablespoons of vegetable oil over high heat.  Saute the chopped onion and garlic for 1 to 2 minutes.  Add the chopped serrano chilies, chopped tomatoes and the shredded meat.  Continue to cook for 2 to 3 minutes.

Add the chile puree and 1 cup of the broth that the meat was cooked in.  Season with salt.  Cover the skillet and reduce heat to low.  Let simmer for 20 minutes.  *If sauce is too thick, stir in more of the broth, until desired consistency.

Serve with Mexican Rice and plenty of warm corn tortillas.  Enjoy!!!

lacocinadeleslie.com


Comfort Food Classics: Picadillo Dreams