Chimichangas.  Now that's a word I don't hear everyday in Mexico.  And it wasn't a word I heard growing up in the States either.

When I was little, my grandmother would wrap whatever leftovers she had (mostly beans) in flour tortillas, then fry them in oil until they were golden brown. She called them Burritos Fritos (fried burritos). 

I loved Burritos Fritos and often took them to school for lunch.

It wasn't until I was in my teens, that we learned that these fried burritos had another name.

Now, I've mentioned that my grandparents and I would go camping almost every weekend in Oak Glen, California. Every Friday evening, there was a potluck for all of the campers.

Well, one weekend, Gramm completely forgot about the potluck.  She looked inside our camper's very small refrigerator, hoping to find a little inspiration to prepare a quick dish to share with our fellow campers.

She pulled out a plastic bowl with leftover refried beans, a block of cheese and flour tortillas.  In no time at all, Gramm had prepared a platter full of her Burritos Fritos. 

A few of the women at the potluck raved about how good Gramm's Chimichangas tasted.

Gramm and I weren't sure what a Chimichanga was, and informed the ladies that what they were eating were Burritos Fritos.

The kind ladies were a little surprised to learn that we, being Mexicans and all, didn't know what a Chimichanga was.  They explained that these fried burritos were sold at many a Mexican restaurant and were called Chimichanga's.

Who knew?!

I now make Chimichangas for my kids and they find the name rather amusing.

Chimichangas can be made with just about anything; refried bean, carne asada, grilled chicken, you name it!  I prepared mine with Ground Beef filling.

Traditionally, Chimichangas are deep-fried in oil.  But I prefer to toast mine on a comal (griddle).  And to "kick them up a notch", I like to top them with a little cheese and sauce.

Chimichangas

Ingredients:

  • 3 large dried ancho chilies
  • 2 cups water
  • 1 medium onion, finely chopped
  • 1 to 2 cloves garlic, finely chopped
  • 2 pounds ground beef, pork or chicken
  • 2 medium tomatoes, finely chopped
  • 2 roma tomatoes, cut in large chunks
  • 1/2 medium onion, cut in large chunks
  • 1 clove garlic
  • 1 teaspoon chicken bouillon
  • Flour Tortillas
  • Shredded Manchego or Cheddar cheese


Directions:
In a small saucepan, bring the dried ancho chilies and 2 cups of water to a boil.  Remove from heat and let cool slightly.


Remove the seeds and stems from the chilies.  Puree in blender, with the water they were cooked in, until smooth.


Heat 2 tablespoons of vegetable oil in a large skillet, over high heat.  Sauté the chopped onion and garlic for 2 minutes.  Add the meat and continue to cook over high heat until the meat is no longer pink.


Stir in the tomatoes and chili puree; season with salt and pepper.  Cover skillet and reduce heat to low.  Let simmer until almost all of the liquid has absorbed.


While the meat is cooking, puree the tomato and onion chunks, with the garlic, chicken bouillon and 2 cups of water.


Pour puree into a saucepan.  Bring to a boil over medium heat.  Reduce heat and continue to simmer until the sauce reduces slightly.


Heat the flour tortillas over very low heat, on a comal or griddle, just until they are very soft and pliable.


Spoon 2 to 3 tablespoons of ground beef filling onto the center of the tortilla.


Fold the outside edges of the tortilla over the filling slightly, to prevent filling from spilling.


Finish rolling up the tortilla to form a burrito.


Place the burritos seam side down on the comal or griddle and toast the burritos until they are a light golden brown on all sides.


To serve, place the burritos seam-side down on a plate.  Top with shredded cheese and warm tomato salsa.  Serve with Mexican Rice and Refried Beans.  Enjoy!!!


With Love,

Chimichangas

You can take the girl out of the U.S., but you can't take away my love for the American version of Mexican food.

My grandparents loved Americanized Mexican food as well, although they weren't big fans of the "Mexican" fast-food chains.

Gramm would prepare a ground beef filling using canned enchilada sauce.  She used the filling for tacos, tostadas, burritos and chimichangas.

When I get a little homesick for my North of the Border Mexican food, I prepare my version of Gramm's filling.

Ground Beef Filling

Ingredients:

  • 3 large dried ancho chilies
  • 2 cups water
  • 1 medium onion, finely chopped
  • 1 to 2 garlic cloves, finely chopped
  • 2 pounds ground beef, pork or chicken
  • 2 medium tomatoes, finely chopped


Directions:
In a medium saucepan, bring the dried ancho chilies and 2 cups of water to a boil.  Remove from heat and let cool slightly.

Remove the stems and seeds from the chilies.  Puree the chilies and the water they were cooked in, until smooth.  Season with salt; set aside.


Heat 2 tablespoons of vegetable oil in a large skillet over high heat.  Saute the onion and garlic for about 2 minutes.


Add the ground beef and continue to cook over high heat until the meat is not longer pink.


Stir in the tomatoes and chile puree; season with salt and pepper.


Reduce the heat to low; cover skillet and let the meat simmer until almost of the liquid has absorbed. Enjoy!!!


--------------------------------------------------------------------------------------

Now that we have this delicious filling, a tasty North of the Border meal is just minutes away.

Gringo Tostadas

Ingredients:

  • Ground Beef Filling
  • Tostada Shells
  • Shredded lettuce
  • Chopped tomato
  • Shredded Manchego or Cheddar cheese
  • A jar of your favorite Tomato Salsa (I like Salsa El Pato)


Directions:
Spoon a couple of tablespoons of Ground Beef Filling on top of tostada shells.


Top with shredded lettuce, chopped tomato, grated cheese and tomato salsa.  Enjoy!!!


With Love,

Making a run for the border {Ground Beef Tostadas}

What a week this has been!

I've had ups.  I've had downs.  And all because of one teeny, tiny, little change to this blog.

When I first started the Recipes by Leslie blog, I wanted to purchase my own custom domain.  But I wasn't even sure if I was going to like having a food/recipe blog, so Hubby suggested that I wait.

Hubby said that if after a year, I was still actively involved with this blog, he would purchase my custom domain as a blogiversary present!

Well...guess what?  My one year anniversary is a little more than a week away.  And Hubby kept his promise.  On Sunday, we purchased our custom domain.

I really wanted to keep the Recipes by Leslie name, but it wasn't available.

What to do?

Hubby and the kiddies quickly came up with a long list of suggestions.  Some were too long and/or too complicated.  The shorter ones were taken.  Some were in Spanish.  Others were in English.  This went on for a while, until finally the kiddies came up with something we all liked...La Cocina de Leslie (Leslie's Kitchen).

As soon as I made the purchase, I was informed that it would take up to 3 days for it to be fully functional.  This wasn't a problem, because the blog was still accessible through the blogspot address.

But yesterday, I had a slight panic attack.

I tried to access my blog with both the custom domain and the Recipes by Leslie address.  Both resulted in "Error.  Requested URL not found."

I immediately contacted the folks at Google Help.  In less than five minutes, www.lacocinadeleslie.com was up and running!

To celebrate the new address, I've made a few changes with the header and am trying to decide on a background.  What do you think?  Love it?  Hate it?  Any suggestions?

Changes...


I ♥ cookbooks!  So, when I read about Michel-lee's Cookbook Swap a few weeks ago, I jumped at the chance.

I was a little worried that I wouldn't be able to participate because I do live in Mexico and shipping can get pretty expensive.

But then, Monica from Lick the Bowl Good was kind enough to offer to ship a cookbook to me so that I could participate. For that kind and generous gesture, I am an even bigger fan of Monica than before.


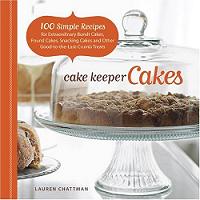
The cookbook Monica sent me was Cake Keeper Cakes by Lauren Chattman.  


I love it!  This book was actually on my wishlist.  It is full of yummy cake recipes that are "too simple and delicious to reserve for birthdays and anniversaries."

The book is divided into the following chapters:
  • Snack cakes 
  • Round cakes
  • Loaf cakes
  • Bundt cakes
  • Crumb cakes & other cakes baked in a Springform pan
  • Angel Food & Chiffon cakes
I already have a long list of cakes that I want to bake from Cake Keeper Cakes, like  Chipotle-Chocolate Cake, MangoUpside-Down Cake, Dulce de Leche Coffee Cake and Nutella Swirl Pound Cake.

A very big THANK YOU to Michel-lee and Monica for making my first cookbook swap a memorable experience! 

I leave you with these lovely pics from my Cake Keeper Cakes cookbook.  Enjoy!!!

Sour Cream and Lemon Cake


Peanut Butter & Jelly Crumb Cake

Nectarine Cake with Cinnamon-Nut Topping

Maple Syrup Gingerbread

Peanut Butter-Sour Cream Bundt Cake
with Butterfinger Ganache Glaze

Cranberry-Walnut Bundt Cake
with Maple-Espresso Glaze


With Love,

Cookbook Swap...

We've spent the last two days at El Rancho.  Not that any of us mind.  The six of us absolutely love being there.

Yesterday was no different.

Although it was Good Friday, which is the last Friday of Cuaresma, we had the best dinner.  So good in fact, that I just had to share it with you and hopefully make up for the absence of yesterday's Meat-Free Friday.

A little rustic.  Four ingredients.  Very easy to put together.  And oh-so-delicious!

My brother-in-law first tried these Quesadillas de Camaron (Shrimp Quesadillas) in Puerto Vallarta.  Only there, they were called Tacos de Gobernador (Governor's Tacos) and sold for 28 pesos a taco.

He later found these very same tacos at a restaurant in Guadalajara where they were called Tacos de Presidente (President's Tacos) and were a little cheaper at 22 pesos each.

But why spend that much money when you can make them at home?  We made these on the grill, but they can also be made on a comal or griddle.  Add a little salad or Mexican Rice and you've got yourself one delicious meal!

Quesadillas de Camaron

Ingredients:
  • 1 pound medium shrimp, peeled and deveined
  • Queso Fresco, Queso Adobera or your favorite cheese blend
  • American Cheese slices
  • Corn tortillas

Directions:
Heat the corn tortillas slightly, over low heat.  Place a slice of Queso Fresco on each tortilla.


Top with 2 to 3 shrimp and half a slice of American cheese.


Fold tortillas in half and continue to cook, turning occasionally, until the cheeses have completely melted and the shrimp have turned pink.  To serve, top with Chile de Molcajete or your favorite salsa.  Enjoy!!!


With Love,

Quesadillas de Camaron {Grilled Shrimp Quesadillas}

Yay!  I got my very first blog award! :)


This beautiful Sunshine Award was given to me by Doña Masita.  Those of you who are fans of Mexican food might know her from her wonderful recipes that she shares on the Maseca website.

The Sunshine Award is given to bloggers whose positivity and creativity inspire others in the blog world. Here are the requirements:
  • Put the logo on your blog or within your post.  Pass the award on to as many as 12 bloggers.
  • Let the nominees know they have received this award by commenting on their blog
  • Share the love and link to the person from whom you received this award.
  • Link to the nominees within your post.
    The Sunshine Award goes to:
    1. My good friend Tina @ Cooking w/ Married to a Mexican.  Not only does she have delicious recipes, but she posts them in video form so you can see how easy they are to prepare.  She's been a little busy as of late, but I can't wait until she posts her next video recipe!  (Tina was one of the first supporters of Recipes by Leslie.)
    2. Theresa @ Theresa's Cooking Blog...Her recent recipe for Sweet and Sour Carrots is at the top of my "To Make" list.  (Theresa was also one of the first supporters of this blog, for which I am forever grateful.)
    3. Monica H @ Lick the Bowl Good...Oh wow!  You are all going to love her blog.  She has the best recipes and her photographs are simply breathtaking.
    4. Tancho @ Rancho Canyon Cookbook...A fellow expat whose recipes are always so inspiring.  His recipe for Really, Really, Really Quick Bread has become one of my favorites.
    5. Don Cuevas @ My Mexican Kitchen...Another fellow expat whose recipes are some of my favorites, like his recipe for Homemade Sausage
    6. Lesley @ The Mija Chronicles blogs about life in Mexico City AND posts some of the most creative recipes like her Spicy Oatmeal with Peanuts, Cilantro and Ginger. 
    7. Anabel @ Oven Delights...I love her cakes and am more than just a tad bit jealous of her cake decorating skills. I hope that someday she will start her own business.
    8. Tami @ I don't like mama...Another talented cake/cupcake decorator who recently started her own business.  Her creations are almost too pretty to eat.  Almost!
    9. Katie @ Apple & Spice is always creating tasty treats in her kitchen.  Today she posted the cutest Easter Pizza that looks like a beautifully decorated Easter egg.
    10. My friend Jeff @ Chef Traveler offers a wide variety of recipes that are low in fat!  He even has a daily newsletter that you can subscribe to by email. 
    11. Luigi @ Luigi's Tastes of Italy...I love Italian food and Luigi's recipes for Zuppa di Piselli and Parmigiana di Zucchini are ones that I will be making often!
    12. Last but definitely not least is Heather @ Kitchen Concoctions...Heather picks one cookbook to cook from for a month and posts the recipes and her opinions about the featured book.  I recently won this cookbook in one of her giveaways. 
     
    I hope you will pay them all a visit!
    With Love,

    My First Blog Award

    If you've been following my blog, then you've probably noticed that I'm a bit obsessed with Poblano peppers.  But really, what's not to love?  They're the perfect pepper...not too spicy and not too sweet.  And they are so versatile.

    Poblano peppers are pretty popular in Mexico, too.  They are used for preparing some of my favorite dishes like: Chiles Rellenos, Chiles en Nogada and Rajas con Crema.

    One of the first things I noticed when I moved to Mexico is that whenever a dish is prepared with poblano peppers, onion and corn, the dish is usually called  ___________ Poblano. (Case in point, my recipe for Arroz Poblano.) 

    Today's recipe is no different.  A mixture of roasted poblano peppers, golden corn kernels, onion, shredded chicken and lots of yummy melted cheese make for one heck of a tasty quesadilla.

    Quesadillas de Pollo Poblano

    Ingredients:

    • 1 pound chicken breast, cooked and shredded
    • 2 large poblano peppers
    • 1 small can corn kernels
    • 2 tablespoons onion, finely chopped
    • 2 tablespoons Mexican crema
    • 1-1/2 cups shredded Oaxaca, Asadero or Mozzarella cheese
    • Butter (optional)
    • Flour tortillas


    Directions:
    Roast the poblano peppers on a comal or griddle until the skin is completely charred.  Immediately place the peppers inside a plastic bag; let set for 5 to 10 minutes.  Remove the charred skin, stems and seeds.


    Slice or chop the peppers.


    In a medium bowl, combine the shredded chicken, poblano peppers, corn kernels, and onion.  Stir in 2 tablespoons of Mexican crema: season with salt and pepper.


    Spoon 2 to 3 tablespoons of the filling in center of warm flour tortillas.


    Top with a couple tablespoons of shredded cheese.  Fold the tortillas in half.


    Over low heat, cook the quesadillas on a comal or griddle that has been lightly greased with a little butter.  (The butter is optional but oh-so-tasty!) 


    Serve with Mexican Rice or a green salad.  Enjoy!!!


    With Love,

    Poblano Chicken Quesadillas

    That title sounds fancy doesn't it? This recipe was actually a last-minute creation.  I was going to make Tilapia al Mojo de Ajo, but hubby walked in to say that he was in the mood for something saucy! I opened my fridge to see what ingredients I had on hand to make a quick sauce.  The first things I noticed were the chipotle peppers and the Mexican crema. Hmmmm... I pureed them together and poached some tilapia steaks in the sauce and voila...this lovely dish was born. It was an instant hit with my hubby and kiddies.  And I'm sure it will be a big hit in your house too!

    Tilapia en Crema de Chipotle - lacocinadeleslie.com

    Tilapia en Salsa de Chipotle
    lacocinadeleslie.com


    Ingredients:
    • 3 tablespoons butter
    • 1/2 medium onion, sliced
    • 1 clove garlic, finely chopped
    • 1 cup Mexican Crema or Sour Cream
    • 2 chipotle peppers in adobo sauce 
    • 6 tilapia steaks/fillets 

    Directions:
    Puree the Mexican crema and chipotle peppers in a blender until smooth, set aside. Melt the butter in a large skillet.  Add the the onions and garlic and saute for 2 minutes over medium heat. Stir in the Mexican crema and chipotle sauce; season lightly with salt and pepper. Once sauce begins to bubble, reduce heat and add the tilapia steaks.  Cover and reduce heat to low heat, let simmer for 15 minutes or until fish is completely cooked. Serve with Mexican rice and plenty of warm corn tortillas.  Enjoy!!!


    Tilapia en Salsa de Crema con Chipotle (Poached Tilapia in a Creamy Chipotle Sauce)