Nothing screams Fall like pumpkin!  The weather here has cooled considerably.  By mid-afternoon, I want nothing more than to curl up on the couch with something warm to drink.  A seasonal favorite in our house is Pumpkin Pie Atole!!!  The delicious combination of pumpkin, cinnamon, ginger and cloves in pumpkin pie was the inspiration for this heart warming beverage.
 
Pumpkin Pie Atole

Ingredients:

  • 4 cups milk
  • 2 cups pumpkin puree or 1 (15 oz.) can pumpkin puree
  • 1 can evaporated milk
  • 2/3 cup sugar
  • 1 teaspoon ground cinnamon
  • 1/2 teaspoon ground ginger
  • 1/4 teaspoon ground cloves
  • Whipped Cream (Optional)


Directions:
In a 2-quart saucepan, heat 4 cups of milk over medium heat.


In a blender, puree the pumpkin with the evaporated milk, sugar and spices.


Pour the pumpkin puree into the warm milk.  Stir until well combined.  Continue cooking over medium heat until atole is very warm.


Serve in individual mugs.  For an extra special treat, top with a dollop of whipped cream and sprinkle with ground cinnamon.  Enjoy!!! 


Photobucket

Pumpkin Pie Atole


I can't believe it's been a year since I joined The Cake Slice Bakers.  I've enjoyed baking with this wonderful group of women from around the world, some of whom have become very dear friends of mine.  It was because of The Cake Slice Baker's that I discovered and fell in love with the Southern Cakes cookbook by Nancie McDermott.  It has become one of my favorites.

But a new year has begun with the CSB's and that means that we will now be baking from a new book...Cake Keeper Cakes by Lauren Chattman.  Earlier this year, I received this book as part of a Cookbook Swap from fellow Cake Slice Baker Monica of Lick the Bowl Good.

The first recipe from Cake Keeper Cakes is a Pumpkin-Chocolate Chip Pound Cake.  A moist cake studded with chocolate chips and chopped pecans.  I only made two small changes in the recipe.  I substituted chunks of Carlos V chocolate bars for the chocolate chips and used pecans instead of walnuts.

I would never have thought to combine pumpkin with chocolate, but in this cake they really worked well together.  And I can't wait to make this recipe again.   

Pumpkin-Chocolate Chip Pound Cake
(from Cake Keeper Cakes by Lauren Chattham)

Ingredients:

  • 1-3/4 cups flour
  • 1 teaspoon baking soda
  • 1 teaspoon baking powder
  • 1 teaspoon ground cinnamon
  • 1/2 teaspoon salt
  • 1/4 teaspoon ground cloves
  • Pinch nutmeg
  • 1/2 cup butter, softened
  • 1-1/4 cups sugar
  • 3 large eggs
  • 1 cup pumpkin puree
  • 1 teaspoon vanilla extract
  • 1/3 cup milk
  • 1 cup chocolate chips (I used Carlos V chocolate bars)
  • 1 cup chopped pecans


Directions:
Preheat the oven to 350F.  Coat the inside of a 9 x 5-inch loaf pan with non-stick cooking spray and dust with flour.  Combine the flour, baking soda, baking powder, cinnamon, salt, cloves and nutmeg in a medium mixing bowl; set aside.


In a large mixing bowl, cream together the butter and sugar with an electric mixer on medium-high speed until fluffy, scraping the bowl occasionally.


With the mixer on medium-low speed, add the eggs one at a time, scraping the sides of the bowl after each addition.  Stir in the pumpkin puree, vanilla and milk.


Turn the mixer to low speed and add the flour mixture 1/2 cup at a time, scraping down the sides of the bowl after each addition.


Stir in the chocolate chips and walnuts (or pecans).


Scrape the batter into the prepared pan and smooth the top with a rubber spatula. 


Bake the cake until it is firm to the touch and a toothpick inserted in the center comes out clean, 55 minutes to 1 hour.  Let the cake cool in the pan for 5 minutes, invert it onto a wire rack and then turn it right-side up on the rack to cool completely.


Enjoy!!!


Printable Version

Photobucket

Pumpkin-Chocolate Chunk Pound Cake


We received a large bag of granadas (pomegranates) today from one of my Hubby's cousins.  My kiddies love granadas and have been eating them ALL afternoon. 

A lot of people like to eat pomegranates, but they don't like to peel them because they think it's too much of a hassle and too messy.  But I'm here to tell you that pomegranates are very easy to peel, with very little mess.

The first messy mistake many make is cutting the pomegranate into wedges with a knife.  Don't do it!  By cutting the pomegranate, you're also cutting the arils (seed), causing them to release their bright red juices.  Juice equals mess.  Only use the knife to make a 1/4-inch incision down the side of the pomegranate.


Using the cut as your guide, break open the pomegranate with your hands like you would break off a piece of bread.


Use your fingertips to loosen the arils.  *Keep a damp washcloth nearby to wipe your hands every once and awhile, as well as a lime wedge.  The lime will come in handy to eliminate any accidental stains on your clothes.


Pomegranate seeds can be eaten plain or topped with salt and lime juice.  Enjoy!!!


Photobucket

How to peel a pomegranate

I love today's recipe and not just because of the name.  The word Gringa is usually used in reference to American women.  But it's also a delicious taco.

Gringas are the perfect combination of real Mexican tacos and quesadillas made with flour tortillas.  My favorite restaurant offers both Gringas and Caprichos. (And Sincronizadas!)

Caprichos are made with corn tortillas.

I prefer to cook el bistec (thin cut steak) whole, then chop it into bite-size pieces.  But you can chop the meat first.  It's entirely up to you.  As is your choice of cheese.  I use either Queso Fresco or Oaxaca cheese, but mozzarella or your favorite Mexican blend will work.

I also use a large griddle that fits over two burners.  On one half I cook the meat and on the other I use to heat the quesadillas.  You can use two griddles or skillets.  No special equipment necessary. 


Gringas

Ingredients:

  • 2 pounds thin cut beef steak (I use filete)
  • 6 to 8 oz.  Queso Fresco or Oaxaca or Mozzarella cheese
  • Flour Tortillas
  • 2 cups Cooked Beans
  • Chopped Onion
  • Chopped Cilantro
  • Red and Green Salsas


Directions:
Heat a large skillet, griddle or comal over medium-high heat.  Season the steaks with salt and pepper.  Cook the thin steaks on the griddle until cooked the way you like them.  (I like medium-rare, Hubby and the kiddies like them well-done.)  Transfer the meat to a cutting board and chop into bite size pieces.  *While the meat is cooking, heat the cooked beans. 


While the meat is cooking, heat the flour tortillas, in a separate skillet, until soft and pliable.  Top one flour tortilla with desired amount of cheese.  (Not too much, because you are going to add meat and fixings.)


Place another heated flour tortilla on top of the cheese.  Continue heating on the griddle until cheese has melted completely.  (This is where I like to add a little butter.  It helps give the quesadillas a nice golden color.)


Transfer the quesadillas to a plate.  Spoon 3 to 4 tablespoon of chopped bistec (meat) in center of quesadilla.  Top with desired amount of cooked beans.


Fold your quesadilla in half and voila...your taco/quesadilla is now a Gringa.  Garnish with chopped onion and cilantro.  Serve with Red and Green Salsas


Photobucket

Gringas {Carne Asada Quesadillas/Tacos}

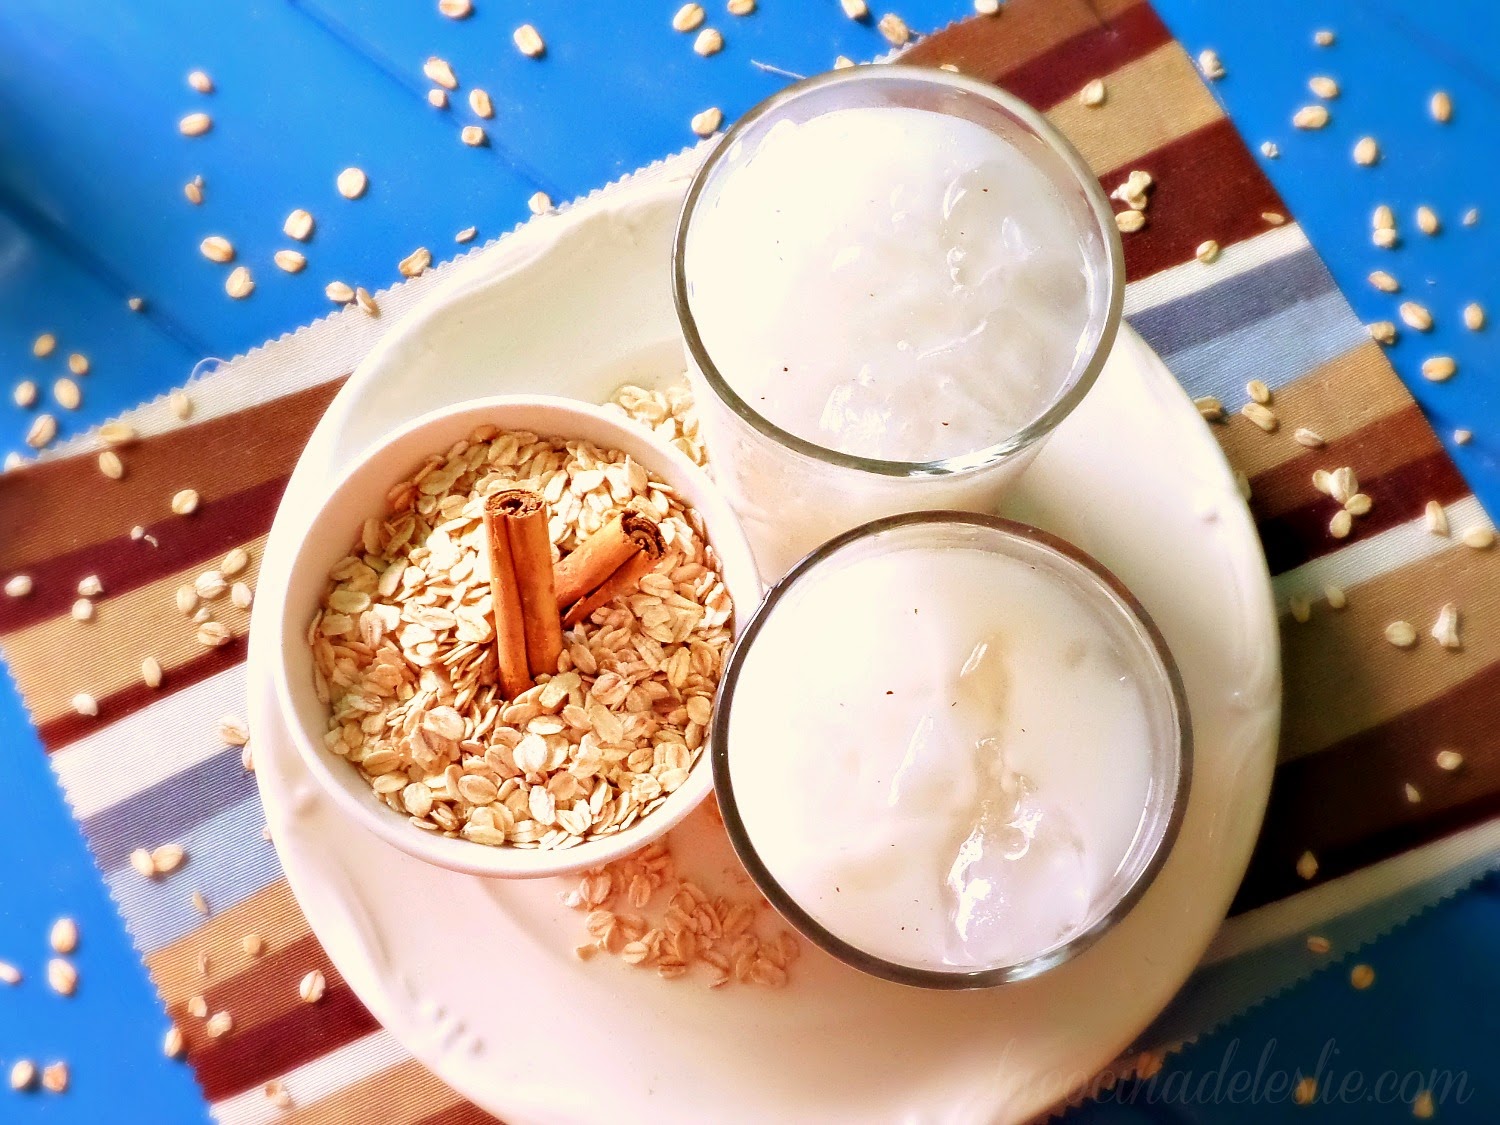
Agua de Avena is hands down my absolute, all-time favorite agua fresca. I could drink the stuff every day and never get bored. And I'm not one of those people that likes to eat (or drink) the same thing day after day. But Agua de Avena is so good, I would gladly drink it every day for the rest of my life. Agua de Avena is very similar to Horchata, a traditional Mexican agua fresca made with rice and cinnamon, hence why some people refer to this agua fresca as Horchata de Avena. Agua de Avena is made with oats, cinnamon, and sweetened condensed milk. If you like Horchata, you are going to love Agua de Avena.

Agua de Avena (Oat Horchata) - lacocinadeleslie.com

Agua de Avena (Oat Horchata)

Leftovers for dinner?  Doesn't sound too appealing does it?  But it doesn't have to be that way.  With a little imagination, I was able to turn some of my leftovers into something amazing.

I was perusing my fridge this morning, hoping to find a little inspiration.  All I found was a stack of corn tortillas from earlier this week and a plastic container of cooked beans.  (Well, that and a few other things!)

After glancing through my pantry to make sure I still had dried chilies, I decided to make Bean and Cheese Enchiladas.  Simple, delicious and best of all, Hubby and the kiddies would never guess that I was using leftovers.

Bean and Cheese Enchiladas

Ingredients:

  • 4 dried ancho chilies
  • 4 dried guajillo chilies
  • 3 cups water
  • 2 cups Cooked Beans, pureed with 1/4 to 1/2 cup bean broth
  • Queso Fresco or your favorite cheese blend
  • Corn Tortillas (Cold tortillas work best)


Directions:
Bring chilies and 3 cups of water to a boil in a medium saucepan.  Let boil for 2 to 3 minutes.  Remove from heat and let cool slightly.  Remove the stems and seeds from the chilies.

In a blender, puree the chilies and the cooking liquid until smooth.  Pour chile puree into a medium bowl or saucepan.  Season with salt; set aside.


Dip the corn tortillas in the dried chile sauce, making sure that both sides are evenly coated.  (If you haven't done so already, puree the beans, before proceeding with the recipe!)


Carefully place the tortilla in the oil and fry for no more than one minute per side.  (You want the tortillas to be soft an pliable, not crisp and stiff!) 


Transfer the fried tortilla to a plate (not your serving plate) and top with generous amounts of beans and cheese. 

Transfer the Enchiladas to a serving plate or platter.  Garnish with Queso Fresco and serve with Sopa de Arroz (Mexican Rice).  Enjoy!!!


Photobucket

Bean and Cheese Enchiladas

A couple of months ago, the beginning of Summer to be exact, I had a sumptuous recipe to share with all of you.  It was THE perfect recipe to use all of the wonderful Summer fruits available at the market. As I was writing the recipe and uploading the pics, my internet connection went out.  I didn't think that it was going to be a problem, because Blogger automatically saves your drafts every couple of minutes. While I waited for my internet connection to return, I decided to do a little Spring Cleaning with the pics on my computer.  I copied my favorite pics to a disc and deleted the rest, including my food pics that I had already used on this blog.  And being ever-so-slightly OCD, I even deleted everything in my recycling bin.

When my internet connection finally returned, I immediately went back to finish the recipe I had been working on.  Well...imagine my surprise when I saw that none of what I had written had been saved, nor had the pics. Noooooo! That really is one of the worst things that could happen to a food blogger.  I was devastated.

Fast forward to today...
I was working on the my recipe index and was looking through my Picassa Web Albums for pics.  Now imagine what a surprise it was to find the pics of the Summer Fruit recipe I had wanted to post months ago!  Woo-hoo!  I am so happy and excited that I just have to share the recipe before I lose the pics again.

The actual name of this fruit dish is Bionico, but here in town we also call it a Preparado.  It's a very popular breakfast at the town's market.  It's a fruit salad make with a mixture of your favorite fruits, Mexican crema sweetened with honey and ground cinnamon and topped with your choice of granola, strawberry jam and/or shredded coconut.

If you want a lighter, healthier Bionico, substitute plain yogurt for the Mexican crema.  This is a great fruit salad to make all year long, using whatever fruits are in season at the moment.

Bionicos (Mexican Fruit Salad) - lacocinadeleslie.com

Bionicos (Mexican Fruit Salad)
lacocinadeleslie.com

Ingredients:
  • 2 cups Mexican crema or plain yogurt
  • 1/4 cup honey
  • 1/4 cup sugar
  • 1 teaspoon ground cinnamon
  • Apple
  • Papaya
  • Banana
  • Strawberries
  • Mango
  • Guavas
  • Granola (for garnish)
  • Strawberry jam (for garnish)
  • Shredded coconut (for garnish)

Directions:
In a medium bowl, mix together the Mexican crema, honey, sugar and ground cinnamon until the sugar dissolves; refrigerate until ready to use.

Peel and chop your favorite fruits into bite-sized pieces. (I used banana, strawberries, apples, papaya, guavas, and mango.)  You need about 1 cup of fruit per serving. Pour the crema mixture over the fruit; stir gently to combine.

Spoon the fruit mixture into individual bowls or cups.  Top with a dollop of strawberry jam, and sprinkle top with shredded coconut and granola. Enjoy!

Breakfast Bionico (Mexican Fruit Salad) - lacocinadeleslie.com


Happy Lil' Surprise: Bionicos (Mexican Fruit Salad)


One ingredient that I have come to love and use often in my cooking is dried chilies.  There are a wide variety of dried chilies available.  The dried chilies I use most are Ancho, Guajillo and Arbol chilies.

Cooking with dried chilies is not difficult at all.  The chilies are either re-hydrated in boiling water or broth, fried in oil or toasted on a comal.  I do recommend rinsing the dried chilies before using them to remove any dust, and removing the stems and seeds before pureeing in a blender.

The first chile I'm going to tell you about is Chile Ancho.  It's a very flavorful (not too spicy) chile used in Mole, Pozole and Enchilada Sauce

Chile Ancho

Next is the chile guajillo.  In Mexico, the chile guajillo is known to "pinta, pero no pica."  (It adds color, not heat/spice.)  The use of chile guajillo in sauces made with chile ancho give sauces and soups a richer color.

Chile Guajillo
Last, but definitely not least, is the chile de arbol.  This is one spicy little chile.  When I started cooking with chile de arbol, I would only add one chile, because I had zero tolerance for the heat.  But after 16 years of
cooking with chile de arbol, I am finally at a point that I can now use 2 chilies!  Kidding!  I can add a handful of chilies to whatever it is I'm making and not burn my tongue off.  Chile de arbol is used in salsas like Chile de Molcajete

Chile de Arbol de Yahualica (The BEST chile de arbol in the world!)


Now that I've told you about my favorite dried chilies, let's get to cooking.  One of the foods I remember most about my summers and holidays spent in San Luis, Sonora are the tacos.  They were deep-fried tacos  made with shredded pork or beef and had some kind of chile sauce or adobo.  I was young and didn't pay much attention to the actual name.  But I never forgot those tacos.  Whenever we would visit other states in Mexico, I would look for my favorite kind of taco, but never found it.

It wasn't until Hubby and I moved to Mexico, that I found a taco that tasted just like the ones I ate when I was a kid.  A vendor who specializes in Tortas Ahogadas, also offers what he calls Tacos de BarbacoaBarbacoa is a complicated process of slow-roasting the meat - beef, pork or sheep - in a special oven or a hole dug in the ground.

But I'm not going to make you work that hard for a delicious taco.  This is a great recipe to use up any leftover roast.

Easy Tacos de Barbacoa

Ingredients:

  • 3 Guajillo chilies
  • 4 Ancho chilies
  • 2-1/2 cups water
  • 3 cups shredded pork or beef
  • Corn Tortillas
  • Vegetable Oil (for frying)
  • Onion slices
  • Lime wedges


Directions:
In a medium saucepan, bring the dried chilies and water to a boil over medium heat.  Remove the saucepan from the heat, cover and let cool slightly. 


Remove the stems and seeds from the chilies.  Puree the chilies and the cooking water they in a blender until smooth.  Pour into a medium bowl or saucepan; season with salt.  Set aside.


Heat dozen (or more) corn tortillas slightly on a comal or griddle, just until they are soft and pliable.  Fill each tortilla with 3 to 4 tablespoons of shredded meat.  Fold the tortillas in half; set aside.


Heat 2 cups of oil in a large skillet.  Dip each taco in the chile puree.


Carefully, place the tacos in the hot oil.  Let fry 1 to minutes per side, until the tacos are crisp.  Transfer the tacos to a paper towel lined plate to remove any excess oil.


Garnish the tacos with onion slices and lime wedges.  (Place the onion inside the taco and squeeze fresh lime juice over the meat and onion.)  Serve with Refried Beans and Sopa de Arroz (Mexican Rice).

Enjoy!!!


Photobucket

Dried Chilies + Pork Tacos = Really Good Eats {Tacos de Barbacoa}