Today for lunch, I decided to surprise my hard working Hubby with one of his favorite dishes...Pollo a la Naranja.  As my grandpa used to say, this dish esta para chuparse los dedos (finger lickin' good).

The reason I refer to this recipe as 1.0 is because I have two delicious recipes for Pollo a la Naranja: the one I am going to share with you today and an Asian inspired dish that I will share soon.

Pollo a la Naranja is one of those dishes that looks and tastes like you spent a lot of time in the kitchen, but it is so easy to put together.

Today, I used bone-in chicken breasts, but you can also use drumsticks or thighs.

In the picture of the final product, you will notice that I served my Pollo a la Naranja with Arroz Verde.  The recipe isn't here on the blog yet, but I will try to post it ASAP.  

Pollo a la Naranja

Ingredients:

  • 2 tablespoons butter
  • 2 tablespoons olive oil
  • Seasoning salt
  • 2 pounds bone-in chicken breast, cut in large chunks
  • 2 cups freshly squeezed orange juice
  • Zest of 2 oranges


Directions:
In a large skillet, heat the butter and olive oil over medium-high heat until butter has completely melted.  Season the the chicken breasts with seasoning salt.  Fry the chicken breasts in the oil/butter mixture until golden brown; turn the chicken over and continue to fry until the other side is also golden brown. 


Pour the freshly squeezed orange juice over the chicken.


Sprinkle the orange zest over the chicken.  Cover the skillet and reduce heat to low.


Simmer the chicken over low heat.  Turn the chicken over after about 20 minutes.  Continue to simmer until the chicken is tender and most of the juice has reduced and caramelized. 


Serve with Arroz Blanco or Arroz Verde and garnish with orange slices.  Enjoy!!!


Photobucket

Pollo a la Naranja 1.0


Today is a very special day here at La Cocina de Leslie.  It's my 2nd Blogiversary!  In honor of such a special occasion, I'm going to share one of my all-time favorite recipes...Enchiladas Suizas.

This is a recipe I have been wanting to share for quite some time now, but for one reason or another, I wasn't able to.  On a couple of occasions, my camera batteries were dead, so I couldn't take pics.  On other occasions, I was in too much of a rush to take pictures.  And then when I finally did take the pics, the notebook I had written my recipe measurements in disappeared.  But today, finally, everything came together and I am able to celebrate my 2nd Blogiversary with a spectacular recipe.  

Literally translated, Enchiladas Suizas means Swiss Enchiladas.  To my knowledge these aren't Swiss in origin, but are called Suizas because Mexican crema is added to the tomatillo salsa.  This is one recipe where I don't recommend substituting sour cream for the Mexican crema.  Doing so would result in a thicker sauce.  I recommend using heavy whipping cream or evaporated milk.

Here in Mexico, I use a combination of Manchego and Chihuaha cheese.  But when I lived in the United States I used both mild cheddar and swiss cheese.  Whichever cheese you decide to use, the results are absolutely deliciosos!  

Enchiladas Suizas


Ingredients:

  • 6 cups water 
  • 2 pounds chicken breast
  • 1/2 medium onion
  • 1 large clove garlic
  • Cilantro
  • 2 teaspoons chicken bouillon (I use Knorr Suiza)
  • 1 poblano chile
  • 24 tomatillos, husks removed
  • 2 serrano chilies
  • 1 clove garlic
  • 3 cups water
  • 1 cup Mexican crema
  • 24 Corn Tortillas
  • 8 oz. Chihuahua cheese, shredded
  • 8 oz. Manchego cheese, shredded


Directions:
Place the chicken, onion, garlic, cilantro and 1 teaspoon of the chicken bouillon in a large saucepan.  Cover with 6 cups of water and season with salt and pepper.  Simmer over medium heat until chicken is tender.  Shred the chicken, once it cools.  (This step can be done the day before.)


To make the Enchilada sauce, place the tomatillos, serrano chilies, garlic and 3 cups of water.  Simmer over medium heat until tomatillos are fully cooked.  Let cool slightly.


While the tomatillos are cooking, roast the poblano pepper in a small skillet or comal over medium-high heat, until all of the skin has blistered.  The poblano pepper will look charred. 


Wrap the roasted poblano pepper in a plastic bag and let sit for about 5 minutes.  This allows the pepper to sweat, making it much easier to remove the skin. 


Using your fingers or the back of a spoon, remove the charred skin and carefully remove the seeds and stem.


In a blender, puree the tomatillos, serrano chilies, garlic and poblano pepper with 2 cups of the water the tomatillos were cooked in and the remaining teaspoon of chicken bouillon.


Pour the puree mixture into a medium saucepan.  Stir in the Mexican crema and season with salt, if necessary.


Pour 1/3 cup of the creamy sauce into a 9-inch square baking dish.


Heat 1/4 cup of vegetable oil in a small skillet over medium heat.  Fry the corn tortillas one at a time, for about 20 to 30 seconds per side.  Add more oil, as needed.  You don't want to fry the tortillas until crisp, because then you won't be able to roll up your enchiladas.  (Don't skip this part, because the tortillas will break and your enchiladas won't hold their shape if you don't fry the tortillas.)  


Transfer the tortillas to a heatproof plate.  Top each tortilla with a couple tablespoons of shredded chicken and cheese.


Roll up the tortillas and place seam side down in the baking dish.  Spoon another 1/3 to 1/2 cup of sauce over the Enchiladas and shredded cheese.


Repeat with another layer of Enchiladas, sauce and cheese.


Bake in a preheated oven at 350F for 25 minutes or until the cheese has melted and turns golden brown around the edges.  Serve with Refried Beans and Mexican RiceEnjoy!!!


Photobucket

La Cocina de Leslie Turns 2 {Enchiladas Suizas}

Do I have a special treat for you today!

Yesterday I spent the morning at my suegra's house helping her prepare one of our favorite warm weather treats: Nieve Raspada!

Nieve raspada is the Mexican version of the snow cone.  But instead of using bottled sugary, high fructose syrups, we make our own almibar (syrup) with real fruit and sugar.  They're not as thick, but oh so delicious and packed with lots of natural flavor.

The almibares that I will be sharing with you today are Fresa de leche (Creamy Strawberry), Tamarindo (Tamarind), and Guayaba (Guava).  And as the warm weather continues, I'll be sharing even more almibares like Strawberry, Limón (lime), Piña (pineapple), Vanilla, Coconut, and my personal favorite Jamaica (hibiscus flower).

Making Nieve Raspada is very easy to do. The first thing you will need is ice.  Crushing a few ice cubes in a blender will work just fine.  But if you want a more authentic raspado and you happen to have a handy-dandy cepillo (ice shaver), make your own block of ice by freezing a 10x3-inch (or larger) baking pan filled with water.  Or you could do what we do and order a 1/4 block of ice from you local ice shop.

Before you start to shave the ice, be sure to place a kitchen towel underneath, to prevent the block of ice from slipping.

Scrape the cepillo in a forward motion over the block of ice. 


The inside of the cepillo will be filled with shaved ice.


Place it in a cup and top with your favorie almíbar


-------------------------------------------------------------------------------------------

And now for the best part...the almíbar (syrup)!


Almibar de Tamarindo (Tamarind syrup)

Ingredients:
  • 1 pound Tamarind Pods (peeled)
  • 3 cups water
  • 6 cups sugar

Directions:
Place the tamarind pods, water and sugar in a large saucepan. 


Simmer over medium heat until the tamarind pods are cooked and tender.  Using a potato masher or the back of a spoon, crush the tamarind pods lightly.  Remove the tamarind seeds with a spoon.


Let almibar de tamarindo cool to room temperature.  Serve over crushed ice or refrigerate until ready to use.  Enjoy!!!


-----------------------------------------------------------------------------------------


Almibar de Guayaba (Guava Syrup)

Ingredients:
  • 1-1/2 pounds guavas (cut in quarters)
  • 2 cups water
  • 6 cups sugar

Directions:
Fill a medium saucepan with the guavas, water and sugar.


Cook over medium heat until mixture thickens.


Let cool to room temperature.  Pour desired amount of almibar de guayaba over crushed ice or refrigerate until ready to use.  Enjoy!!!


---------------------------------------------------------------------------------------------

Almibar de Fresa de Leche (Creamy Strawberry Syrup)

Ingredients:
  • 4 cups milk
  • 2 pounds strawberries (stems removed)
  • 1 cup water 
  • 5 cups sugar
  • lime zest (optional) 


Directions:
In a 2quart saucepan, heat the milk over medium-high heat until very hot.  Set aside and let cool to room temperature.  (You could skip this step, but you run the risk of the milk curdling when adding to the strawberry mixture.)  

Fill a medium saucepan with the strawberries, water, sugar and lime zest.  Cook over medium heat until mixture thickens.


Remove the strawberries from heat and let cool slightly.  Add enough milk (2 to 4 cups) to the strawberry mixture to reach desired consistency.  Pour desired amount of almibar de fresa de leche over crushed ice.  Enjoy!!!


*Keep all almibares refrigerated when not in use. 


Photobucket

We All Scream for Mexican Ice Cream!


It's time, once again, to play your favorite game and mine...NAME THAT FOOD!  (Applause!)

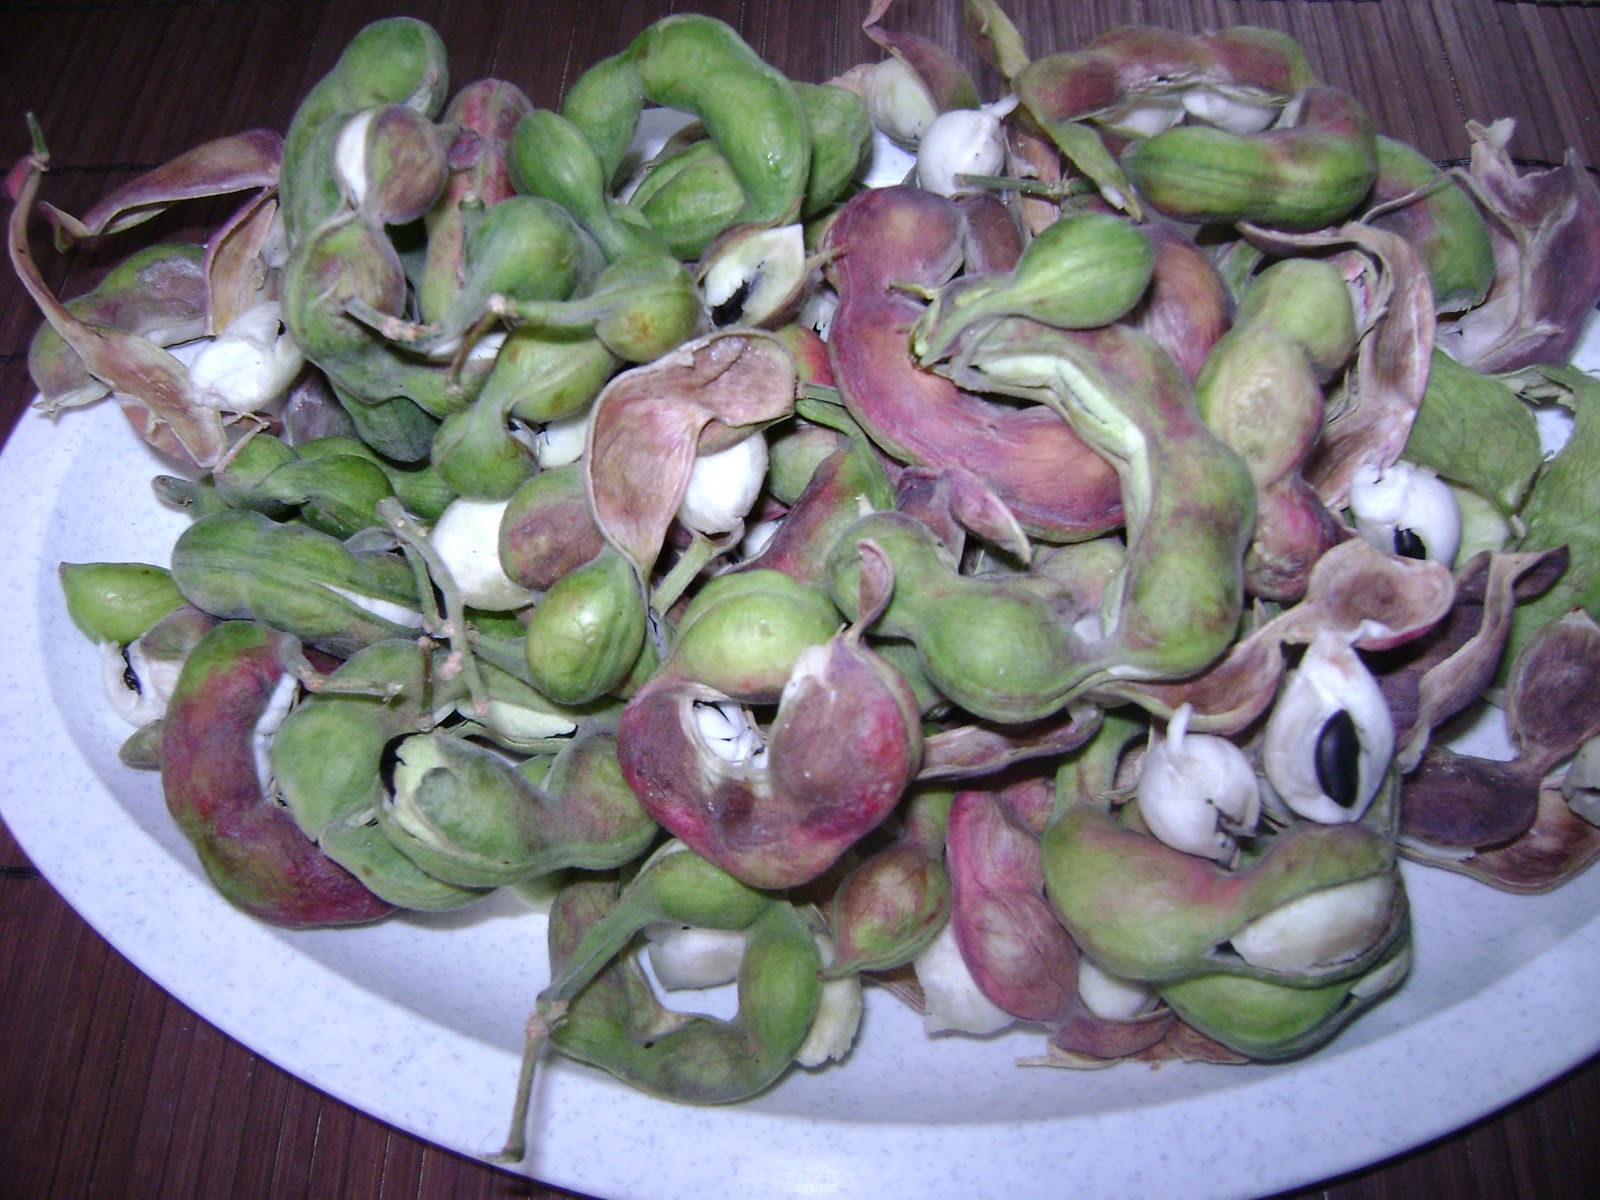
Today's mystery food is a fruit called Guamuchiles.  They grow on thorny trees also called Guamuchiles.  The fruit pods resemble very plump green beans.  The fruit itself is very firm and can be white or pink in color.  And each guamuchil has a black seed inside.


To eat the guamuchiles, you must remove the outer green layer and the black seeds, leaving the white or pink fruit to be eaten raw.  This is one of the few fruits that aren't eaten with salt, chile and lime juice.

As for it's flavor, let me just say that it's an acquired taste.  When I first tried guamuchiles, I didn't care for them much.  They tasted like grass or leaves and left a bitter taste in my mouth.  I later learned that the pink guamuchiles are much sweeter than the white.  I'm still not a big fan of guamuchiles, but I can eat a couple every once and a while.  Hubby and his family are crazy about them. 

If you're in Mexico and you happen upon Guamuchiles in the market, buy a few and taste them for yourself.  But be warned, don't eat too many, because they produce a lot of gas.   

Photobucket

Guamuchiles

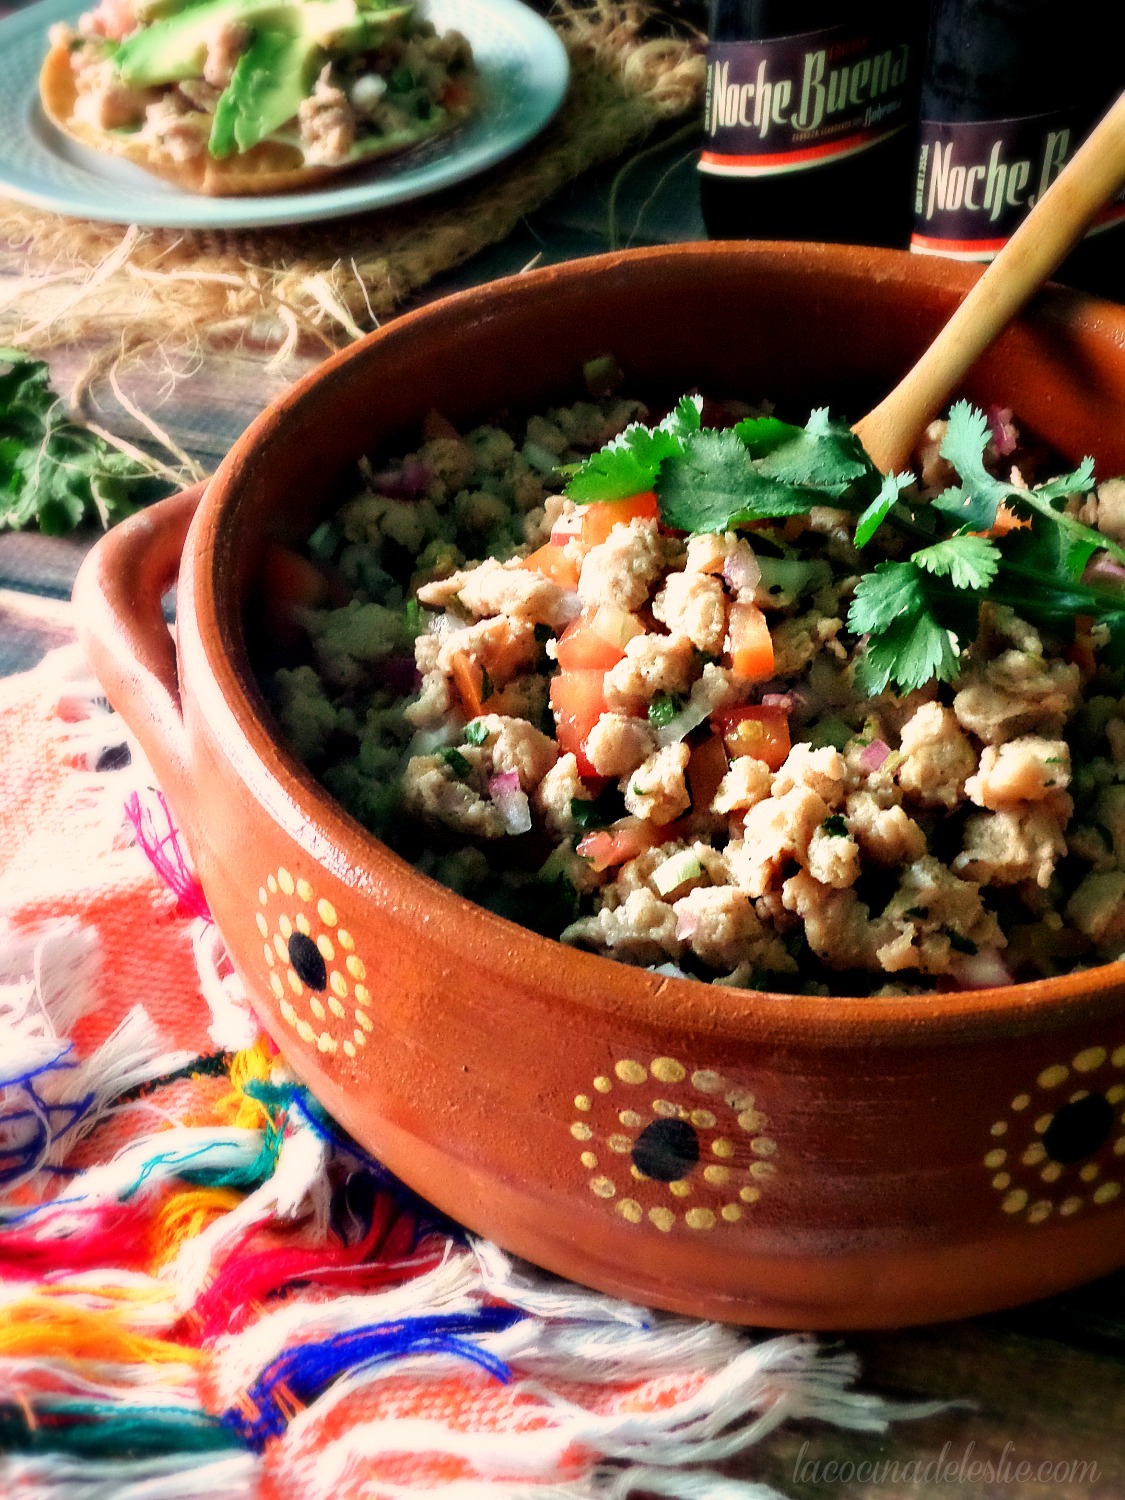
My Hubby loves tuna, canned tuna to be exact.  While he likes Ensalada de Atun (Tuna Salad), he absolutely loves when I make Hamburguesas de Atun (Tuna Burgers).  And best of all, even the kiddies love them.

I like to add chopped serrano chilies and cilantro to give the tuna patties an extra kick.  Those of you with young kiddies can substitute chopped green bell pepper for the serrano chili.  Now you all know that I can't handle really hot food, so imagine my surprise when I thought the tuna patties could have used an extra serrano chili.

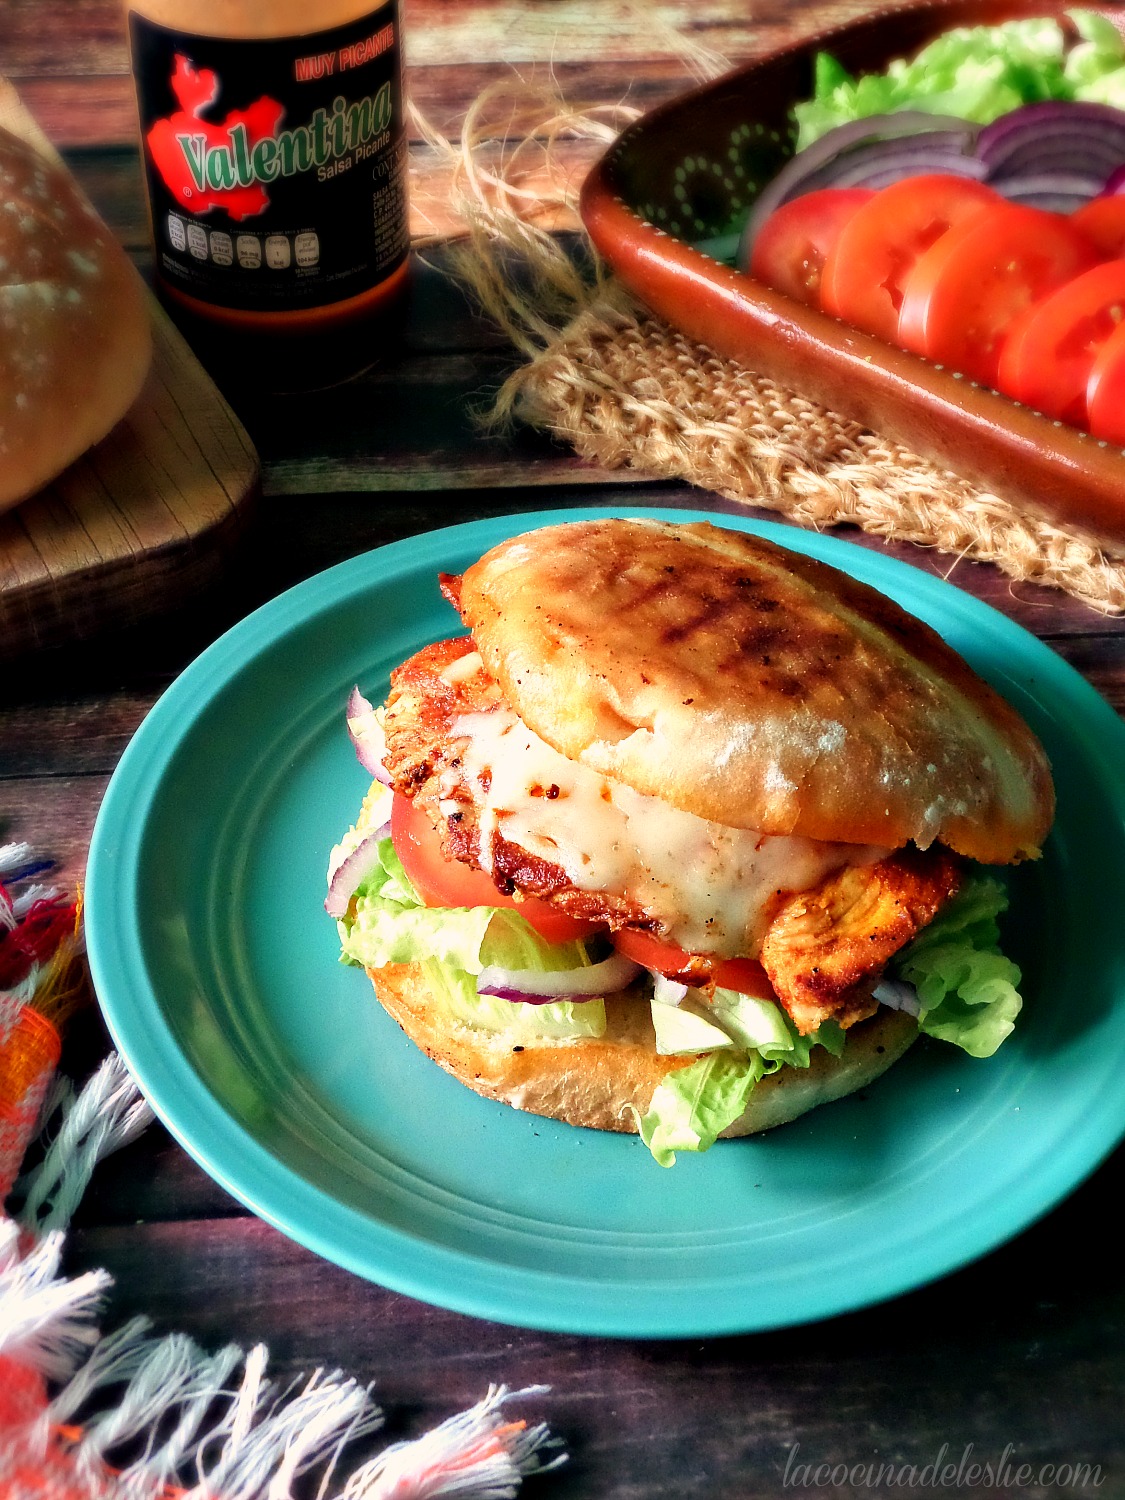
Hubby and I like to top our Hamburguesas de Atun with lettuce, tomato, sliced onion and avocado.  Hubby even adds more heat by topping his burger with canned jalapeño slices.  My kiddies however, prefer to top their burgers with a slice of American cheese and dill pickle slices.  No matter how you choose to serve your burger, you are in for a delicious treat.    


Hamburguesas de Atun

Ingredients:

  • 4 cans tuna, drained
  • 2 eggs
  • 2/3 cup dry bread crumbs
  • 1/2 medium onion
  • 1 to 2 serrano chilies
  • 1 tablespoon chopped cilantro
  • 1 lime, juice only


Directions:
In a medium bowl, combine the tuna, eggs, dried bread crumbs, onion, cilantro, chili peppers and lime juice; season with salt and pepper.


Mix well until the mixture comes together.


Heat a griddle, skillet or comal over medium heat.  Measure 1/3 cup of the tuna mixture for each patty.  Using your hands, flatten the tuna mixture lightly to form the hamburger patties.


Drizzle 1 to 2 tablespoon of vegetable oil onto griddle.  Place patties on griddle and let cook until golden brown on both sides.  (If making Cheesy burgers, top tuna patties with a slice of American cheese as soon as you turn the patties over.)


To serve, spread each hamburger bun half with Mexican crema or mayonnaise.  Place tuna patties on one half and top with your choice of lettuce, sliced tomato, onion and avocado or dill pickles.  Enjoy!!!


Photobucket

Mexican Tuna Burgers

Last Wednesday marked the beginning of Cuaresma (Lent).  Here in Mexico, many people observe Cuaresma by abstaining from meat on Fridays and Holy days such as Ash Wednesday.

It is during this time that we enjoy a meat-free gastronomical extravaganza.  Everything from Tortitas de Camaron (Shrimp Cakes) in Mole Ranchero, Coctel de Camaron (Shrimp Cocktail), Soy Ceviche, Rajas con Crema to the most popular dish of Cuaresma...Capirotada.

Capirotada is a Mexican Bread Pudding, made with bolillo rolls, raisins and nuts, bathed in a piloncillo-cinnamon syrup and topped with melted cheese.  It is a rich and delicious dessert that is synonymous with Cuaresma.  Very much like American Thanksgiving and turkey.

That said, I rarely make Capirotada.  My suegra makes enough for the entire family every week during Cuaresma.

Since suegra always shares her Capirotada with me, I like to prepare different bread pudding recipes to share with her.  And that is where today's recipe comes in.

As soon as I saw it on the King Arthur Flour blog, I knew that I was going to try it during Cuaresma.  It was two of my favorite desserts rolled into one...Pecan Pie Bread Pudding.  Oh.  My.  Goodness.

I did make a couple of changes, like using bolillo rolls instead of white bread.  And because the original recipe calls for Pecan Pie filling in a jar, I used my favorite Pecan Pie recipe, minus the pie crust.  The original recipe also suggests to double the filling recipe so that you're using a total of 6 eggs.  I didn't double the filling only because Hubby and the kiddies aren't fond of very wet bread pudding.  Although, I'm sure it would be absolutely sumptuous with double the filling.

Hubby and the kiddies loved this bread pudding so much, that they gobbled it all up before I was able to share some with my suegra.  No problem, because I will definitely be making this recipe again.   

Pecan Pie Bread Pudding 
(recipe adapted from King Arthur Flour)

Ingredients:
4 bolillo rolls
1/2 cup brown sugar
1/3 cup melted butter
1 cup maple syrup or corn syrup
1/2 teaspoon salt
3 eggs
1 cup pecan halves

Directions:
Cut bolillo rolls into bite-size pieces.  I like to leave them uncovered on the counter for an hour before starting, so they have a chance to dry and don't become to soggy when the liquid is added.


Place bolillo cubes in a large bowl; add pecans and toss lightly.


In medium bowl, whisk together the melted butter, maple syrup, eggs, sugar and salt until well combined.  Pour mixture over bread cubes and stir gently until even coated.


Transfer the bread pudding mixture to a generously greased 9-inch baking dish.  Bake at 350F for 35 to 40 minutes.


Remove from oven.  Enjoy!!! 


Photobucket

Nutty for Bread Pudding {Pecan Pie Bread Pudding}

Name This Food

There's a game that I like to play on my Motherhood in Mexico blog, called Name That FoodSometimes I know exactly what the mystery food is and other days, like today, I have no idea.

My suegra was just given two very large bags of today's mystery food.  We know they are hongos, but what we don't know is what kind of mushrooms they are.

This is where all of you come in.  I need your help with two things:
  1. What kind of mushrooms are they?  And are they edible?  I don't want to accidentally poison my family with toxic mushrooms.
  2. What can my suegra and I make with that many mushrooms? I know I can add them to omelets, pasta, pizza and of course Quesadillas de hongos.  But I'd like to try something new. 
Any suggestions?  

Photobucket

Mushroom Madness